

Luxury Floors for Less
Beautiful floors at brilliant prices


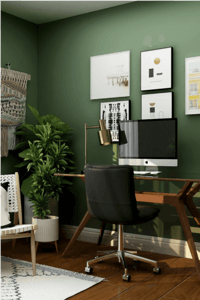
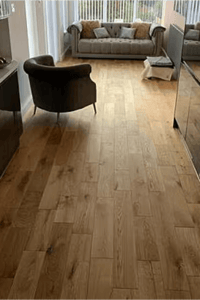
Laminate flooring offers a simple way to update your space. It can be installed directly over existing tile floors, saving time and effort. With its click-and-lock mechanism, laminate provides a secure fit for a fresh look without removing the old tile. Choose laminate flooring for an easy and stylish renovation.
Flooring choices shape the character of our homes, directly impacting both aesthetics and functionality. Amidst a sea of options, two contenders often prompt homeowner debates: the classic permanence of tile and the versatile mimicry of laminate. As you consider revamping your space, the question arises: can one be layered upon the other?
Understanding the basics of laminate flooring and its adaptive nature is crucial before embarking on a renovation journey. Similarly, the time-tested durability of tiles cannot be overlooked, but does this ceramic stronghold offer a sound foundation for laminate to rest upon? This decision is not merely about looks; it's a complex dance of practicality and style.
Embark on an informative exploration of both worlds in the ensuing article. From the familiarity of ceramic tiles and their benefits to the surprising versatility of laminate options, we dive into installation techniques, moisture barriers, and the challenges that may arise. Prepare to discover if combining these flooring giants is a feat of design ingenuity or a renovation misstep.
When considering a home renovation or a new flooring project, it's essential to explore the wide variety of flooring types available. Each type of flooring comes with its own unique aesthetic appeal, functionality, and set of considerations for installation and maintenance.
Choosing the right flooring for your home involves considering the specific needs of each room. Tiles might be perfect for bathrooms, while a cozy bedroom may benefit from the warmth of carpet or hardwood. Other factors to consider include the level of foot traffic, exposure to moisture, and the need for a moisture barrier or underlayment.
Laminate flooring, for instance, often requires a foam underlayment to provide a cushioned surface and additional moisture protection. On the other hand, ceramic tile floors must be laid on a level substrate, sometimes necessitating the use of a leveling compound or special glues to fill grout lines and ensure a smooth surface.
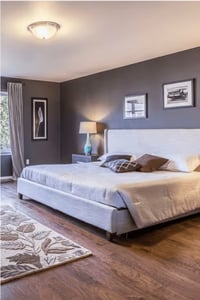
When we compare the benefits and drawbacks of each flooring type, several factors stand out. The type of laminate used can drastically affect the floor's durability and moisture resistance, whereas ceramic tile floor's longevity comes at the cost of a hard and cold surface. Hardwood flooring's advantage is the warmth and resale value it provides, though it is more prone to moisture damage. Vinyl floors offer a balance between cost-effectiveness and durability, with a softer feel but may not add as much value to a home.
Installation processes also differ—installing a laminate floor may involve interlocking pieces, whereas laying down a ceramic tile floor involves mortar and grout. Concrete slabs offer a unique aesthetic but will require professional preparation and finishing to achieve a truly smooth surface.
In conclusion, selecting the right type of flooring requires careful consideration of each material's aesthetic appeal, cost, maintenance requirements, and suitability for each room's function. Future passages can delve into the proper installation process for each flooring type, providing a step-by-step guide to achieving the best results, along with tips from flooring experts to ensure that homeowners make well-informed decisions for their flooring projects.
When renovation work beckons or the urge to renew your space surges, you may wonder if it's possible to lay down new laminate flooring directly over an existing ceramic tile floor. Positive news awaits those wishing to avoid the arduous task of tile removal: indeed, laminate floor installation can be carried out successfully over tile, provided certain conditions are met. This unique adaptation of flooring types offers a swift and often cost-efficient way to refresh your living space.
Laminate flooring, a popular choice for modern homes, is engineered as a multi-layer synthetic product, mimicking hardwood with photo-realistic imagery sealed beneath a clear protective layer. The bottom layer, known as the backing, is designed to resist moisture—a critical feature when installing over potentially damp surfaces like concrete slabs or ceramic tiles.
Prior to laminate floor installation over a tile floor, certain prerequisites must be ensured for proper installation. Significant among these are:
With diligence in preparation, laying laminate over tile can endow your room with a refreshing new look minus the toilsome task of removing the old ceramic tiles.
Laminate flooring comes in a wide variety of options, each suited to different needs and aesthetic preferences. Among the types of laminate flooring you can choose from are:
These varieties also come in different thickness levels, affecting their durability and how they feel underfoot. Some are better suited for rooms with high foot traffic, while others are chosen for their luxury appeal.
Pros:
Cons:
When considering laying laminate floor over a ceramic tile floor, take into account these pros and cons. Consulting with a flooring expert and utilizing the right moisture protection techniques, including vapor barriers or a compatible foam underlayment, are essential steps to ensure a successful and enduring laminate floor installation.

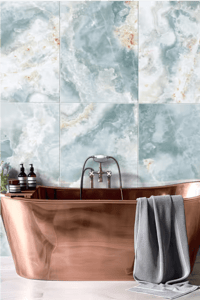
Tile flooring is a durable, versatile option that has been a favorite in homes for centuries. With its natural, earthy roots, ceramic tile flooring is known for both its practicality and aesthetic appeal. It is a well-suited choice for areas exposed to moisture, such as kitchens, bathrooms, and laundry rooms, as well as high-traffic zones in both residential and commercial spaces.
One of the most significant advantages of ceramic tile flooring is its durability. Ceramic tiles are tough, making them resistant to scratches, dents, and stains, provided they are glazed. They are also known for maintaining their appearance over time, resisting fading even when exposed to direct sunlight. With minimal maintenance—regular cleaning with standard products—these tiles can look pristine for decades. Moreover, because they don't harbor dust or allergens, they contribute to healthier indoor air quality. Additionally, the vast range of designs and styles means that ceramic tiles can fit virtually any decor theme.
Ceramic tiles come in several different types, each with unique attributes suitable for various applications:
A list of ceramic tile finishes could also include:
When weighed against other flooring types, ceramic tiles offer a healthy balance of cost, longevity, and ease of maintenance.
|
Ceramic Tile | High | Low | Medium | High | Moderate-Difficult |
Laminate Floor | Moderate | Low | Low-Medium | High | Easy |
Hardwood | High | High | High | High | Difficult |
Vinyl Floors | Moderate | Low | Low | High | Easy |
It's clear that ceramic tile flooring is a sustainable and stylish choice that can endure the wear and tear of daily life. It also provides excellent moisture protection when properly sealed, unlike laminate, which requires additional moisture barriers. Yet, if the situation allows, laminate can be an attractive, cost-efficient layer to be applied over existing tile, offering a fresh facade while leveraging the tile's inherent sturdiness. Consulting with a flooring expert can guide homeowners on the best material for their specific situation, considering all variables from foot traffic to climate conditions.
considered to ensure a seamless and durable finish. These include assessing the condition of the tile floor, ensuring a moisture barrier is in place, and preparing the surface for the new flooring.
The importance of proper installation for laminate flooring cannot be overstated. Installing a new laminate floor over a ceramic tile floor is a viable option that can rejuvenate a space without the hassle of removing existing flooring. Before initiating the installation process, several key factors must be considered. Core installation can lead to issues like buckling, gaps, and even structural damage over time. Ensuring a flat, clean, and stable surface is vital for the long-term health of the laminate floor. Additionally, correct installation factors in the use of vapor barriers and underlayments to protect against moisture—a critical step, especially when installing over a concrete slab. Proper installation not only guarantees that your new floor will look great but also ensures that it will perform well and last for years to come.
To install laminate flooring over a ceramic tile floor, follow these steps:
Knowing that the installation process for ceramic tile flooring is quite different from laminate, here are some essential tips for a successful tile floor installation:
Remember, whether installing laminate over tile or working on a fresh tile floor, taking the time to do the job correctly will yield the best results, combining durability with aesthetic pleasure.
A moisture barrier is an essential component in the installation of laminate flooring, as well as many other flooring types. Its primary function is to prevent moisture from seeping up from the subfloor, which can wreak havoc on floors, causing warping, buckling, and mold growth. This is especially important when laying laminate or hardwood flooring over concrete slabs, which naturally retain moisture. By incorporating an effective moisture barrier, the integrity and longevity of the flooring are significantly enhanced, safeguarding your investment and maintaining a healthy indoor environment.
Installing a moisture barrier is an integral step that should not be overlooked during the floor installation process. A vapor barrier essentially acts as a protective layer between the subfloor and your chosen type of flooring. It is designed to impede the capillary action of water, ensuring that any moisture present beneath, such as in a concrete floor, does not penetrate and damage the flooring material above. Without this crucial barrier, the moisture could compromise the adhesive used with vinyl floors, the structural integrity of laminate planks, and potentially the finish and fit of hardwood flooring, leading to costly repairs in the future.
The selection of a moisture barrier varies depending on the types of flooring being installed:
| Flooring Type | Moisture Barrier Option |
Laminate | Foam underlayment with moisture lock |
Hardwood | Felt paper |
Vinyl | Plastic film / Vinyl underlayment |
To ensure that your floors remain in good condition for as long as possible, implementing proper moisture protection during the installation is crucial. Here are some key steps to follow:
Remember, the key to a successful, long-lasting floor over tiles, concrete, or any substrate, hinges on the proper installation and appropriate moisture protection measures. By taking these steps seriously, homeowners will enjoy a floor that not only looks great but is also durable and easy to maintain.
When considering the installation of a laminate floor over an existing ceramic tile floor, certain challenges must be addressed to ensure a smooth and successful upgrade. Despite the allure of bypassing the removal of old tiles, factors such as the condition of the tile floor, moisture presence, and levelness can affect the outcome of your new flooring.
One of the most significant hurdles in laying laminate over tile is managing the grout lines. Pronounced grout lines can telegraph through the new laminate flooring, causing an unsightly and uneven appearance. Furthermore, the hard surface of ceramic tiles requires that the new flooring type, like laminate or vinyl floors, have a sufficient underlayment to provide comfort and sound insulation.
Another potential issue is the height transition between rooms. Installing a floor over tiles inevitably raises the floor level, which can lead to difficulties with doorframes, appliances, and transitions to other types of flooring. Proper planning is crucial to mitigating these issues.
Before laying a new floor over tile, it's critical to inspect for and rectify any loose tiles or unevenness. The presence of loose tiles can undermine the structural integrity of the new flooring, while uneven surfaces can lead to "soft spots," which may cause laminate planks to move or flex underfoot.
A leveling compound is often used to even out the tile floor and fill in grout lines, creating a smooth surface. This step is essential in achieving a proper installation that can stand the test of time.
| Issues to Address | Solution |
Pronounced grout lines | Use leveling compound |
Uneven surfaces | Apply leveling compound |
Loose tiles | Re-attach, remove and fill |
Height transition issues | Adjust door frames as needed |
To successfully install laminate flooring over a ceramic tile floor, the following installation process can be employed:
Remember to consult a flooring expert if you encounter challenges beyond the scope of DIY efforts. Proper steps taken during the installation process can lead to a durable, attractive, and well-functioning new laminate floor installation.
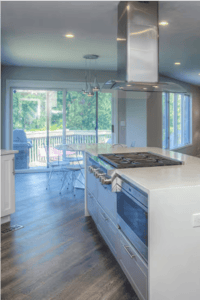
Vinyl flooring has become a popular choice for various residential and commercial settings due to its versatility. Not only does it come in a wide variety of designs and textures, mimicking the appearance of hardwood flooring or ceramic tiles, but vinyl floors are also lauded for their resilience and ease of maintenance. This type of flooring caters to a spectrum of budgets and performance requirements, ensuring a solution for virtually any flooring need.
Vinyl flooring is a synthetic type of flooring lauded for its durability and cost-effectiveness. There are several key benefits that make vinyl an attractive option:
The choice between luxury vinyl plank (LVP) and commercial-grade vinyl surfaces typically depends on the intended use and desired aesthetics:
Feature | Luxury Vinyl Plank | Commercial Grade Vinyl |
| Construction | Multi-layer; Thick wear layer | Heavy-duty; Dense wear layer |
| Design/Appearance | Mimics hardwood and stone | Typically utilitarian |
| Durability | Durable with high residential or light commercial use | Extremely durable for high-traffic commercial use |
| Installation | DIY-friendly; can be click-and-lock or glue-down | Often requires professional installation |
| Comfort | Softer and warmer underfoot | Harder surface, less comfort |
| Cost | Moderate | Higher, due to durability features |
Luxury vinyl planks are often selected for residential use due to their realistic look and comfort, while commercial grade vinyl flooring is chosen for its ability to withstand heavy foot traffic and resistance to wear in commercial environments like hospitals and schools.
When installing vinyl floors, certain tips can ensure a successful application over various surfaces:
By following these guidelines, DIYers and professionals alike can ensure proper installation of vinyl floors over various types of subfloors and existing flooring, leading to long-lasting and appealing results.
Baseboard installation serves as the finishing touch to any flooring project. Whether you're installing laminate flooring, vinyl floors, or hardwood flooring, this crucial step not only enhances the overall appearance but also plays a key role in protecting the walls from kicks, scuffs, and furniture bumps. Properly installed baseboards can also help to seal the gap between the floor and the wall, which can improve insulation and prevent dust buildup.
Baseboards are not merely an aesthetic feature; they are integral to a flooring project's durability and finished look. Their purpose goes beyond concealing the uneven edges and gaps of a floor's perimeter; they also provide critical protection.
| Aspect | Significance |
| Aesthetic Appeal | Baseboards deliver a clean, crisp border around the room, giving it a more polished and elegant appearance. |
| Physical Protection | They guard the bottom portion of the walls from damage due to impacts, abrasions or furniture placement. |
| Dust and Insect barriers | Properly installed baseboards can act as a deterrent for dust accumulation and insect entry points. |
| Moisture Barrier | Along with flooring vapor barriers, baseboards can help minimize moisture migration from the wall to the floor, which is particularly important over a concrete slab. |
| Expansion Compensation | They can hide the necessary expansion gaps left around the room for flooring types like laminate and vinyl that expand and contract with temperature changes. |
Understanding the dual functional and decorative role of baseboards underscores their importance in a well-executed flooring project. Ensuring proper installation and considering material compatibility with the chosen floor can extend the life and improve the outcome of your new flooring.
Skip the Demo! Upgrade Your Tile with Laminate Flooring.


This product has now been removed from your favourites.