


Luxury Floors for Less
Beautiful floors at brilliant prices


hardwood flooring transition is necessary when two connecting rooms both have wooden flooring...
A hardwood flooring transition is necessary when two connecting rooms both have wooden flooring. Flooring transitions allow you to reverse of the direction of tongue and groove planks that make up your wooden flooring. There are two options for accomplishing this transition smoothly: with T-moulding or with a spline. While both have their benefits, it is important to research which option suits your space before beginning an installation and many flooring companies in the UK can help you with this decision process.
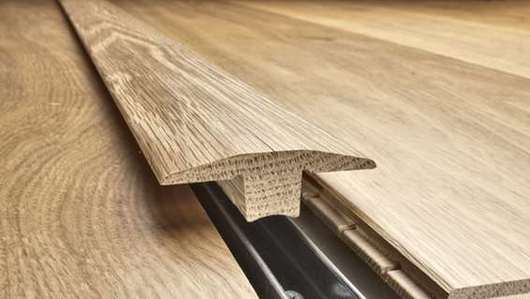
Today we are going to discuss how to install a T-moulding transition. The name "T-moulding" represents the shape of a cross section of flooring. This type of moulding provides a transition between rooms, most commonly in a doorway. The top part of the T-moulding is visible on top of the wooden flooring and creates a small lip. This can be an advantage especially when there is a gap of space below a door that you wish to fill.
When installing T-moulding, you first want to measure, cut and lay out all of the hardwood planks until you reach the doorway. T-moulding should be perfectly centred in a doorway, and the last plank laid out in the room should end just before the midpoint of the doorway.
Next, measure the distance between the frames of the door. You want to measure an equal distance on your piece of T-moulding and mark where cutting is needed. After cutting the T-moulding to size, sand down the edges for a smoother fit. Accuracy during the cutting process is key to getting the T-moulding piece to fit tight and not end up with a piece that is too short.
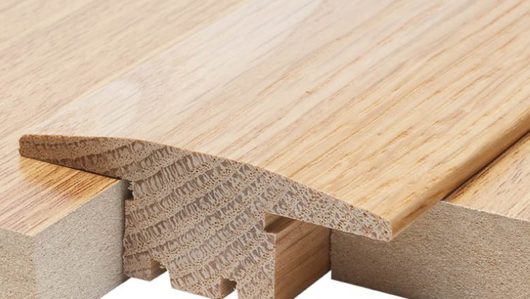
The next step is to test your T-moulding piece against the wooden planks. Hold the piece of T-moulding against the last plank laid. You should be able to see the groove of the plank. Position the T-moulding so that it will attach and be flush against the plank. After cutting and installing the next planks in the adjoining room, you are ready to put in the T-moulding. Hold the planks' grooved ends up to the sides of the T-moulding and check once again for a flush fit. If you are certain you will have an accurate fit, now it is time to place wood glue along the corners of the T-moulding where the vertical portion meets the horizontal portion. Then, place a line of glue along the bottom side of the vertical part. Press the T-moulding firmly and evenly against the wooden planks.
Finally, it is time to add the finish nails. You may lightly hammer in a few finishing nails into the side of the "T" shape, just below the upper lip. It is also recommended to place two more spots of wood glue in the same places on the other side of the T-moulding and set in the first plank that is pointed in the opposite direction. Now you can finish laying your solid oak flooring planks in the adjacent room. If you need more help and ideas with installing any type of transition mouldings, contact us and try our free flooring samples!


This product has now been removed from your favourites.