


Luxury Floors for Less
Beautiful floors at brilliant prices


Laminate flooring is an affordable, durable, and low-maintenance option for homeowners looking to update their flooring. Whether you're a seasoned DIYer or a beginner, installing laminate flooring can be a satisfying and rewarding project. With its simple click-and-lock design, laminate flooring is relatively simple to install and can be done on the weekend with the right tools and materials.
This guide will take you through the entire process of laying the laminate flooring, from preparation to finishing touches. Laminate flooring offers several benefits over other types of flooring. For one, it is more durable and resistant to scratches, stains, and fading. It is also simple to clean and maintain and is available in a wide range of styles and finishes to suit any decor.
Before we get started, let's take a look at the tools and materials you will need for this project:
It's important to note that laminate flooring is different from other types of flooring in that it is not nailed or glued to the subfloor. Instead, it relies on its click-and-lock design and the weight of the flooring to stay in place.
The initial step in installing laminate flooring is to measure the room and determine the amount of flooring you need. Be sure to include any closets, nooks, or other areas that will be covered with the laminate flooring. Most laminate flooring is sold in packages that include several planks, and it is important to purchase enough to complete the entire project without running out of material.
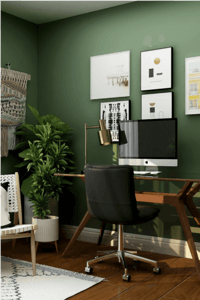
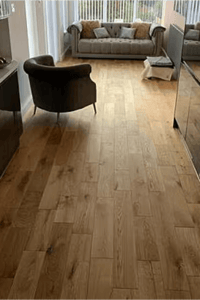
When choosing your laminate flooring, consider the planks' style, finish, and thickness. Some techniques, such as those that resemble hardwood flooring, are more realistic and will enhance the look of your home. Thicker planks are also more durable and can be more comfortable underfoot.
Before laying the laminate flooring, it is essential to check the level of the subfloor and correct any issues. The subfloor should be clean, dry, and free of debris. If the subfloor is concrete, it is essential to install a barrier to prevent moisture from penetrating the laminate flooring.
Once the subfloor is prepared, you can lay out the laminate flooring to ensure a balanced and aesthetically pleasing look. Make sure to space the end joints of the planks and mark and cut the planks to fit around doorways and other obstacles.
Installing laminate flooring requires precision and attention to detail, but it can be a straightforward process with the right tools and materials. The installation process is divided into two parts: underlayment installation and laminate flooring installation.
The underlayment is a barrier between the subfloor and the laminate flooring, providing cushioning and reducing noise. To install the underlayment, follow these steps:
1. Unroll the underlayment and cut it to size, ensuring it fits the room's dimensions.
2. Install the underlayment in sections, making sure to overlap seams and secure the edges. Begins in one corner of the room and works toward the opposite wall.
3. Ensure the underlayment is smooth and wrinkle-free, as any bumps or wrinkles can cause the laminate flooring to be uneven.
The laminate flooring installation process is where the beauty of your new floor will start to take shape. Follow these steps for a successful installation:
You can ensure a successful outcome by following these steps. A successful laminate flooring installation that will last for years.
After the laminate flooring installation is complete, the final step is to clean up any excess adhesive and debris. Clean the floor with a broom or vacuum, being careful not to scratch the surface. After cleaning, allow the foot to settle for the recommended time before moving furniture back into the room. Regular maintenance is essential to keep your laminate flooring looking its best. Sweep or vacuum daily to remove dirt and dust, and use a damp mop to clean any spills or stains. Additionally, it's essential to protect the floor from scratches by placing protective pads under furniture.
Laying laminate flooring can be challenging, but with the right tools and materials, it can be a rewarding DIY project. You can do so by following the steps outlined in this guide. Achieve a beautiful, long-lasting floor that will enhance the look of your home. Always follow the manufacturer's instructions for the best results, and clean and maintain your base regularly to keep it looking its best. With patience and attention to detail, you can create a stunning laminate floor that will last for years.
In conclusion, laminate flooring is an excellent option for those looking to update their home without breaking the bank. It is durable, easy to maintain, and comes in various styles and finishes to suit any decor. By following this step-by-step guide, you can install laminate flooring in your home confidently, knowing that you are creating a beautiful, functional space that will envy your neighbors.
Transform Your Home with Elegant Laminate Flooring from Easy Step Flooring.
Ready to upgrade your home's floors and achieve a sleek, modern look?
Look no further than Easy Step Flooring!
Our expert team is here to guide you every step of the way and provide the highest-quality laminate flooring products on the market. Click now to browse our selection and transform your home today!
1. What type of subfloor do I need for laminate flooring?
Laminate flooring can be installed on concrete, plywood, or OSB (oriented strand board) subfloors. The subfloor should be clean, flat, and free of any deformities.
2. Can laminate flooring be installed over an existing floor?
Yes, laminate flooring can be installed over an existing floor, but removing any existing flooring is recommended, and starting with a clean, flat subfloor for best results.
3. How much time does it take to install laminate flooring in a room?
The time required to install laminate flooring will increase and vary based on the room's size and the installer's level of experience. On average, installing laminate flooring in a standard-sized room can take one to two days.
4. How do I clean and maintain my laminate flooring?
Laminate flooring should be cleaned regularly with a damp mop or cloth. Avoid excessive water, wax, or oil-based cleaners, as these can damage the laminate. Protective pads should be used on furniture to prevent scratches and scuffs.
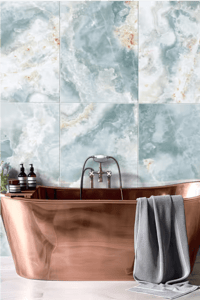
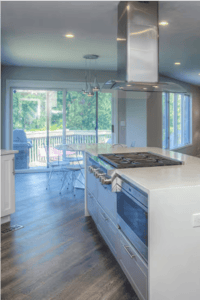
5. Can laminate flooring be installed in bathrooms and kitchens?
Yes, laminate flooring can be installed in bathrooms and kitchens. Still, it is essential to choose a moisture-resistant type of laminate flooring and to establish a moisture barrier, if necessary, properly.
6. Can laminate flooring be refinished or sanded?
No, laminate flooring cannot be refinished or sanded as solid wood flooring can. If the surface becomes damaged, it will need to be replaced.
7. What is the warranty for laminate flooring?
The warranty for laminate flooring will vary based on the manufacturer and the type of laminate. Some laminate flooring guarantees 10-25 years, but it is essential to carefully read and understand the warranty before purchasing and installing it.


This product has now been removed from your favourites.